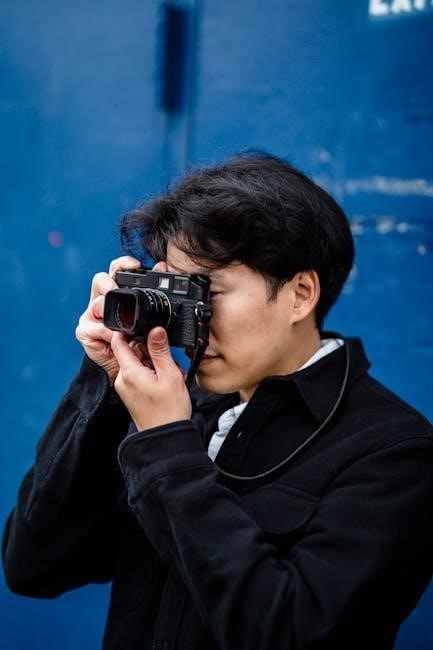
Manual mode empowers photographers to precisely control aperture, shutter speed, and ISO, enabling creative command over outdoor shots. It offers flexibility to capture stunning images in diverse lighting conditions, ensuring optimal results by adjusting settings to match artistic vision and environmental challenges.
Why Manual Mode is Essential for Outdoor Photography
Manual mode is indispensable for outdoor photography as it offers precise control over aperture, shutter speed, and ISO, allowing photographers to adapt to diverse lighting conditions. Unlike automatic modes, Manual mode ensures creative freedom, enabling photographers to fine-tune exposures for optimal results. Outdoor environments often present unpredictable lighting, such as high-contrast scenes or changing weather, where Manual mode’s flexibility is crucial. It empowers photographers to balance artistic vision with technical requirements, ensuring sharp focus, proper exposure, and desired effects like motion blur or depth of field; By mastering Manual mode, photographers can consistently produce professional-quality images, making it an essential skill for capturing stunning outdoor shots.
Understanding the Exposure Triangle
The exposure triangle, comprising aperture, shutter speed, and ISO, forms the foundation of photography. Aperture regulates light entry and depth of field, with lower f-stops creating a shallow focus and higher f-stops sharpness across the image. Shutter speed controls motion capture, freezing action with fast speeds or creating blur with slower ones. ISO adjusts light sensitivity, with lower values reducing noise in bright conditions and higher values enhancing low-light performance. Balancing these elements is key to achieving precise exposures, especially outdoors where lighting varies. Mastering the exposure triangle in Manual mode allows photographers to adapt to changing conditions, ensuring well-exposed images that align with their creative intent, whether capturing portraits or landscapes.
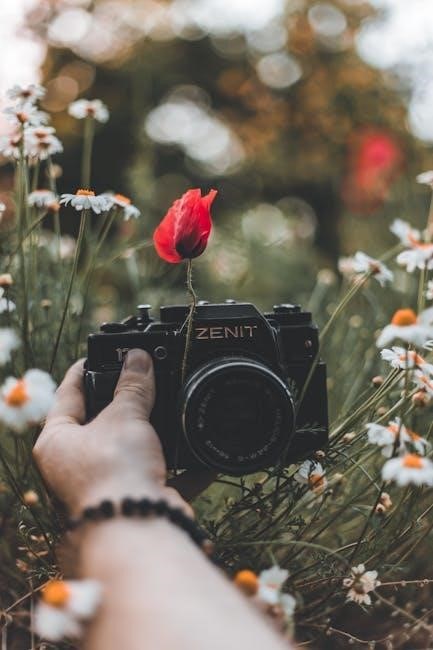
Mastering Aperture in Outdoor Photography
Aperture control is crucial for outdoor photography, allowing precise depth of field adjustments. Wide apertures isolate subjects, while narrow apertures sharpen landscapes, ensuring creative focus in varying conditions.
Aperture and Depth of Field
Aperture plays a pivotal role in determining depth of field, which is the area in focus within an image. A wide aperture, such as f/2.8, creates a shallow depth of field, ideal for isolating subjects like portraits, where the background becomes blurred. This technique emphasizes the subject and reduces distractions. Conversely, a narrow aperture, such as f/11, increases depth of field, keeping both foreground and background in sharp focus, which is perfect for landscapes. However, extremely narrow apertures can lead to diffraction, slightly softening the image. Understanding this balance allows photographers to achieve the desired artistic effect in their outdoor shots.
Choosing the Right Aperture for Portraits
For outdoor portraits, selecting the right aperture is crucial to achieve the desired effect. A wide aperture, such as f/2.8 or f/4, creates a shallow depth of field, blurring the background and isolating the subject. This emphasizes the person and reduces distractions, making it ideal for capturing sharp, professional-looking portraits. However, be cautious not to go too wide, as it may cause parts of the subject, like the ears or hair, to fall out of focus. A slightly narrower aperture, such as f/5.6, can provide a better balance, ensuring the entire face is sharp while still blurring the background. Experiment with different apertures to find the perfect balance for your outdoor portrait photography.
Optimizing Aperture for Landscapes
For landscape photography, optimizing aperture is key to ensuring sharp focus across the entire scene. A narrow aperture, such as f/8 to f/16, maximizes depth of field, keeping both foreground and background elements in focus. This is especially important for capturing sweeping vistas or detailed textures in outdoor environments. However, be aware that very narrow apertures (e.g., f/22 or higher) can cause diffraction, slightly softening the image. To achieve the best results, test different apertures to find the balance between depth of field and sharpness for your specific lens and scene. Using a tripod is essential to prevent camera shake with slower shutter speeds often paired with smaller apertures.
Understanding Diffraction and Its Impact
Diffraction is a phenomenon that affects image sharpness when using very narrow apertures (e.g., f/16 or higher). As the aperture closes, light bends around the blades, causing softening of details. This can be particularly noticeable in landscape photography, where sharp focus across the entire frame is often desired. While diffraction is unavoidable, its impact can be minimized by selecting the widest aperture that still maintains adequate depth of field. Experimenting with different f-stops helps find the optimal balance between sharpness and depth. Additionally, using high-quality lenses and modern camera sensors can reduce the visibility of diffraction, ensuring crisp and detailed outdoor images even at smaller apertures.
Shutter Speed Techniques for Outdoor Photography
Shutter speed is crucial, as it freezes or blurs motion and controls light exposure. Fast speeds (1/500th of a second) capture sharp action, while slower speeds (1/30th) create artistic blur, ideal for water or clouds. Adjusting this setting based on the scene enhances dynamic outdoor shots, balancing creativity with technical precision to achieve desired effects.
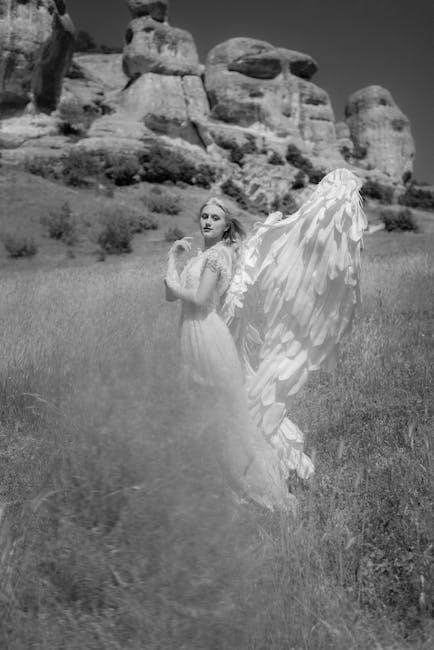
Freezing Motion with Fast Shutter Speeds
Fast shutter speeds are essential for capturing sharp images of moving subjects in outdoor photography. A speed of 1/500th of a second or faster freezes motion, ensuring that details like wings in flight or sports action remain crisp. This technique minimizes blur caused by subject movement or camera shake, delivering precise results. For wildlife or action shots, fast shutter speeds are indispensable. Pairing them with a lower ISO (100-400) maintains image quality in bright light, common in outdoor settings. Experiment with speeds to find the balance between freezing motion and maintaining natural-looking images, ensuring your outdoor photography captures dynamic moments with clarity and precision. Proper use of fast shutter speeds enhances the overall impact of your photos, making them stand out. By mastering this technique, you can confidently handle a variety of outdoor scenarios, from sports to wildlife, ensuring your images are sharp and vibrant every time.
Creating Motion Blur with Slow Shutter Speeds
Slow shutter speeds add artistic motion blur to outdoor photography, conveying movement and dynamism. Speeds like 1/30th of a second or slower are ideal for blurring water, clouds, or moving subjects, creating a sense of flow. This technique requires a tripod to prevent camera shake. Experiment with speeds to achieve the desired blur effect without oversoftening details. For rivers or waterfalls, slower speeds (1-30 seconds) enhance the silky, flowing appearance. When photographing moving subjects like animals or vehicles, mid-range speeds (1/10th to 1/60th) balance blur and sharpness. Motion blur adds depth and emotion to images, making them visually engaging. Use this technique creatively to capture the essence of outdoor scenes, where movement tells a story. Proper execution transforms ordinary shots into extraordinary ones, highlighting the beauty of motion in nature and life;
Using a Tripod for Stability
A tripod is essential for stability in outdoor photography, especially with slow shutter speeds or low light conditions. It prevents camera shake, ensuring sharp images. Choose a sturdy tripod with a smooth head for easy adjustments. Use tripod legs made of durable materials for stability on uneven terrain. A tripod allows hands-free operation, reducing vibrations and blur. In windy conditions, use weighted tripods for added stability. For long exposures, a tripod is crucial. It enables precise framing and focus, allowing photographers to experiment with creative techniques. Regular tripod use improves overall image quality, making it a must-have accessory for outdoor photography. It enhances control over manual settings, ensuring consistent results. A tripod is a key tool for mastering manual mode, providing stability and precision.
ISO Settings for Outdoor Photography
ISO adjusts light sensitivity, balancing image quality and noise. Use low ISO (100-400) for bright conditions to minimize noise and high ISO (800-3200) for low-light, optimizing exposure while managing grain.
Low ISO for Bright Light Conditions
Using a low ISO (100-400) is ideal for bright outdoor conditions, as it minimizes digital noise and ensures crisp, clean images. In sunny environments, lower ISO settings preserve detail and color accuracy, preventing overexposure. This range is perfect for capturing sharp landscapes or portraits under direct sunlight, where light is abundant. A low ISO also enhances the dynamic range, allowing for better contrast and vibrancy in your photos. Higher ISOs can introduce grain, which is undesirable in bright settings. By keeping ISO low, you maintain image quality and achieve professional-looking results. Always prioritize the lowest possible ISO for optimal clarity in well-lit outdoor scenarios.
High ISO for Low-Light Situations
In low-light outdoor conditions, such as during dawn, dusk, or in shaded areas, using a high ISO (e.g., 800-6400) is necessary to capture sufficient light. This setting increases your camera’s sensitivity, allowing you to achieve properly exposed images without additional lighting. However, higher ISOs can introduce digital noise, which may degrade image quality. To minimize this, use the lowest ISO possible while still achieving a well-exposed shot. Modern cameras handle high ISOs better, but it’s crucial to balance light capture and noise reduction. Experiment with your camera’s ISO range to find the optimal setting for your specific low-light outdoor scenario and ensure the best possible results.
Minimizing Noise in High ISO Settings
To reduce noise when using high ISOs in low-light outdoor photography, start by using the lowest necessary ISO to minimize grain. Ensure your camera is stabilized, either by hand or with a tripod, to avoid motion blur and enable slower shutter speeds without camera shake. If possible, shoot in RAW format for better post-processing control, allowing you to adjust noise reduction effectively. Many cameras also feature built-in noise reduction settings that can help mitigate digital artifacts. Additionally, using external editing software during post-processing can further refine the image, balancing detail retention with noise suppression. Balancing these techniques ensures high-quality images even in challenging lighting conditions.
Additional Camera Settings for Outdoor Photography
Beyond the exposure triangle, white balance, metering modes, and RAW/JPEG selection are crucial for outdoor photography. These settings enhance color accuracy and flexibility in post-processing, optimizing image quality in diverse lighting conditions.
White Balance and Color Accuracy
White balance is essential for achieving natural colors in outdoor photography. It adjusts how your camera interprets light, ensuring whites appear white and other hues remain true. Different light sources, such as sunlight, shade, or clouds, emit varying color temperatures. Using preset white balance settings like Daylight, Cloudy, or Shade helps match these conditions. For precise control, custom white balance allows you to capture accurate colors by referencing a neutral gray card. Accurate white balance enhances realism and reduces post-processing time. Experimenting with these settings ensures your images reflect the actual scene, preserving the vibrancy and authenticity of outdoor environments.
Using Metering Modes Effectively
Metering modes are crucial for achieving accurate exposure in outdoor photography. Evaluative/matrix metering analyzes the entire scene, providing balanced exposure in most conditions. Center-weighted average prioritizes the frame’s center, ideal for centrally placed subjects. Spot metering measures light in a small area, perfect for high-contrast scenes or precise subject exposure. Understanding these modes helps adapt to changing light, ensuring well-exposed images. Experiment with different modes to match lighting conditions and subject placement, refining your approach for consistent results in diverse outdoor settings.
RAW vs. JPEG: Which is Better for Outdoor Photography?
For outdoor photography, RAW files are preferable due to their uncompressed data, offering greater flexibility in post-processing. They provide a wider dynamic range, allowing recovery of details in high-contrast scenes, which is common in outdoor settings. While RAW files require more storage and specialized software, they enable precise adjustments to exposure, white balance, and shadows. JPEGs, though convenient with smaller file sizes, discard image data, limiting post-processing capabilities. For optimal control and quality, especially in challenging lighting, RAW is recommended. However, if storage or workflow constraints exist, high-quality JPEGs can still deliver excellent results. Balancing file type with workflow needs is key to maximizing outdoor photography potential.
Advanced Techniques for Outdoor Photography
Mastering advanced techniques like bracketing, focus stacking, and filter use can elevate outdoor photography. Bracketing captures high-contrast scenes, while filters enhance colors and reduce glare. Tripods ensure stability for sharp images, and histograms guide precise exposure adjustments, optimizing image quality in challenging conditions.
Bracketing for High-Contrast Scenes
Bracketing is a powerful technique to capture high-contrast scenes by taking multiple shots at different exposures. This process ensures both bright and dark areas are properly exposed. In outdoor photography, where sunlight and shadows often coexist, bracketing allows for merging images to retain detail in both highlights and shadows. By using manual mode, photographers can adjust aperture, shutter speed, and ISO to create a series of images with varying exposures. These images can then be combined using HDR software to produce a single photo with enhanced dynamic range. This method is particularly effective for landscapes and scenes with extreme lighting conditions, ensuring a balanced and visually striking result.
Focus Techniques for Sharp Images
Achieving sharp focus is critical for outdoor photography, where subjects like landscapes or wildlife require precise clarity. Using manual focus allows photographers to pinpoint the exact area of interest, ensuring sharpness. Techniques like back-button focusing enable faster and more accurate focus control. For landscapes, a narrow aperture (f/8-f/11) maximizes depth of field, keeping the entire scene sharp. With wildlife, a wide aperture (f/2.8-f/4) isolates the subject, while fast shutter speeds freeze motion. Pre-focusing on a specific area and using continuous AF for moving subjects enhances sharpness. Regularly calibrating lenses and using a tripod further ensure razor-sharp images. These focus techniques, combined with manual settings, help capture the desired level of sharpness in any outdoor setting.
Using Filters to Enhance Outdoor Shots
Filters are invaluable tools for enhancing outdoor photography, offering creative control and technical improvements. Neutral Density (ND) filters reduce light entry, allowing slower shutter speeds to capture motion blur in water or clouds. Circular Polarizing (CPL) filters enhance colors, reduce glare, and deepen blue skies; Graduated ND filters balance exposure in high-contrast scenes, preventing blown-out skies. Using filters with manual mode provides precise control, enabling photographers to achieve desired effects without over-reliance on post-processing. They protect lenses and add unique artistic touches, making them essential for capturing stunning outdoor images with professional quality and visual impact in various lighting conditions.
Common Mistakes in Manual Mode
Avoid common errors like overexposure, underexposure, and ignoring the histogram. These mistakes can ruin shots, but mastering manual settings and understanding the exposure triangle helps prevent them.
Overexposure and How to Avoid It
Overexposure occurs when too much light reaches the sensor, resulting in washed-out highlights and loss of detail. To prevent this, use faster shutter speeds, narrower apertures, or lower ISO settings. Pay attention to your camera’s histogram, ensuring the graph doesn’t spill over on the right side. Bracketing shots can also help capture a range of exposures, which can later be merged for better dynamic range. Additionally, using filters like neutral density (ND) filters can reduce light intake, especially in bright outdoor conditions. Regularly reviewing your images and adjusting settings accordingly will help maintain optimal exposure and preserve image quality.
Underexposure and How to Correct It
Underexposure occurs when your image is too dark, often losing detail in shadows. This can happen in low-light conditions or when settings are too restrictive. To correct it, increase ISO, widen the aperture, or slow the shutter speed. Using a wider aperture (lower f-number) allows more light, while a slower shutter speed increases exposure time. Raising the ISO boosts sensitivity, though be cautious of noise. Utilize your camera’s histogram to ensure the graph doesn’t bunch on the left. If underexposure persists, consider bracketing shots or using a tripod for stability. Regularly reviewing your images and adjusting settings helps maintain proper exposure and preserves shadow details.
Ignoring the Histogram
Ignoring the histogram can lead to poorly exposed images, as it provides crucial data on brightness distribution. Overlooking it risks losing detail in highlights or shadows. The histogram shows if your image is under or overexposed. By analyzing its peaks, you can adjust aperture, shutter speed, or ISO to balance exposure. For example, a histogram bunched on the right indicates overexposure, while one on the left signals underexposure. Regularly checking the histogram ensures your photos capture maximum detail, especially in outdoor lighting where conditions can vary. Adjusting settings based on histogram feedback helps achieve well-balanced exposures and preserves image quality for optimal post-processing results.
Outdoor Photography in Specific Conditions
Outdoor photography demands adaptability across varying conditions. Sunny days require fast shutter speeds, while cloudy or overcast days may need lower ISOs. Golden hour calls for precise aperture adjustments to capture vibrant colors and soft light, balancing exposure for stunning results in dynamic lighting scenarios.
Best Settings for Sunny Days
For sunny outdoor photography, start with a moderate aperture like f/5.6 to f/11 to balance depth of field and light control. Use a fast shutter speed (1/125s or faster) to freeze motion and prevent overexposure. Set ISO to 100-400 for optimal image quality with minimal noise. These settings ensure sharp, well-lit images. A tripod can help maintain stability, especially in bright light. Adjust the exposure triangle to match the scene, prioritizing low ISO for clarity. Bracketing shots can help capture high-contrast scenes, blending them later for optimal dynamic range. Sunny conditions offer vibrant colors, so precise settings are key to avoiding blown highlights and preserving detail.
Best Settings for Cloudy or Overcast Days
Cloudy or overcast days offer soft, diffused light, ideal for capturing details in both shadows and highlights. Use a lower aperture (f/2.8–f/5.6) to isolate subjects and create a shallow depth of field. Shutter speed can be slightly slower (1/60s–1/125s) to allow more light, but avoid blur by using a tripod if necessary. Keep ISO low (100–400) to minimize noise. White balance should be set to “Cloudy” or “Shade” for natural color tones. Bracketing shots can help capture a wide dynamic range, especially in high-contrast scenes. Monitor the histogram to ensure proper exposure and adjust settings as needed. Manual focus can also help achieve sharp images in low-light conditions. These settings enhance the moody, even lighting of cloudy days, perfect for portraits and landscapes.
Best Settings for Golden Hour
Golden hour, just before sunrise or after sunset, offers warm, soft light, perfect for capturing vibrant colors and long shadows. Use a wide aperture (f/2.8–f/4) to isolate subjects and create a shallow depth of field, enhancing the golden glow. Shutter speed can be moderate (1/125s–1/250s), but slower speeds (1/30s–1/60s) can create a sense of motion blur in clouds or water. Keep ISO low (100–400) to minimize noise. White balance set to “Daylight” or “Cloudy” enhances warm tones. Bracketing shots helps capture high dynamic range, especially in scenes with both bright skies and dark shadows. Monitor the histogram to ensure proper exposure and adjust settings as needed. These settings maximize the artistic potential of golden hour, ideal for both portraits and landscapes.

Specialized Outdoor Photography Scenarios
Specialized outdoor photography requires tailored manual settings for scenarios like wildlife, portraits, and landscapes. Adjust aperture, shutter speed, and ISO to capture sharp, dynamic images in diverse conditions.
Wildlife Photography Settings
In wildlife photography, precise manual settings are crucial for capturing sharp images. Use a fast shutter speed (1/1000th of a second or faster) to freeze motion and ensure clarity, especially for moving subjects. Opt for a wide aperture (f/2.8 to f/5.6) to isolate animals from their surroundings, creating a professional bokeh effect. Keep ISO low (ISO 100-400) to minimize noise while ensuring sufficient light. For low-light situations, increase ISO cautiously to avoid grain. Use continuous autofocus and burst mode for tracking subjects. A tripod or monopod can add stability, but handheld shooting is often necessary for dynamic compositions. These settings help achieve crisp, high-quality wildlife images in various outdoor conditions.
Landscape Photography Settings
For landscape photography, use a narrow aperture (f/11–f/16) to maximize depth of field, ensuring sharp focus from foreground to background. A slower shutter speed (1/30s–30s) can create a serene effect by blurring water or clouds. Set ISO to 100–400 for minimal noise under bright conditions. Use a tripod to stabilize the camera, especially with slower speeds. Neutral density (ND) filters can help control light for better exposure. Bracket your shots to capture a wide dynamic range, merging later in post-processing. These settings enhance detail and depth, producing stunning landscape images with precise control over light and composition.
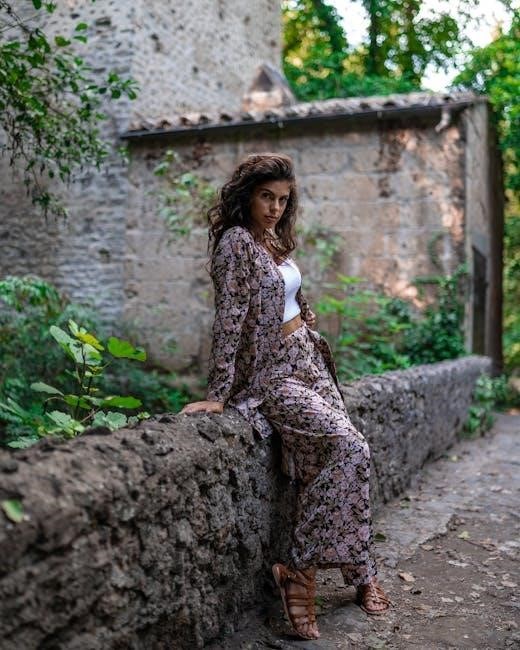
Portrait Photography Settings
For outdoor portraits, prioritize a wide aperture (f/2.8–f/5.6) to create a shallow depth of field, isolating your subject and blurring the background for a professional bokeh effect. Use a fast shutter speed (1/250s or faster) to freeze motion and avoid blur. Set ISO to 100–400 for optimal image quality in bright light. Experiment with angles and lighting, such as the golden hour, for soft, flattering illumination. Manual focus ensures sharpness on your subject’s eyes. These settings help capture crisp, high-quality portraits with artistic control over depth and light, making your subject stand out in outdoor environments.
Mastering manual mode enhances outdoor photography by granting precise control over exposure, enabling photographers to capture stunning images with creative intent and technical excellence consistently.
Final Tips for Mastering Manual Settings
To excel in manual mode, practice regularly and experiment with different settings to understand their impact on your images. Use a tripod for stability, especially in low-light conditions, and review your shots to refine your technique. Pay attention to the histogram to ensure proper exposure and adjust settings accordingly. Experiment with various apertures, shutter speeds, and ISOs to achieve desired effects like depth of field or motion blur. Stay patient and persistent, as mastering manual mode takes time and practice. By consistently applying these strategies, you’ll gain confidence and improve your ability to capture stunning outdoor photographs with precision and creativity.
Practice and Experimentation
Regular practice and experimentation are key to mastering manual mode in outdoor photography. Start by shooting familiar subjects under various lighting conditions, adjusting aperture, shutter speed, and ISO to observe their effects. Experiment with different combinations to achieve desired results, such as isolating subjects with wide apertures or capturing motion with slow shutter speeds. Reviewing your images and analyzing what worked well helps refine your skills. Over time, this hands-on approach builds intuition and confidence, enabling you to adapt quickly to changing outdoor environments. Consistent practice ensures that manual mode becomes second nature, allowing you to focus on creativity and capturing memorable moments.